With so many of these mods appearing each week, we thought it would be a good idea to start a ‘Mod of the Week’ column that, as the title suggests, looks at the best Fallout 4 mod to hit the Nexus Mod site over the past seven days. We’ll be examining our chosen mod, explaining what it does, how it affects the game, and how to implement it - as well as showing off some images, of course.
Our first Fallout 4 Mod of the Week is…
Commonwealth HQ Landscape Overhaul WIP by Printerkop
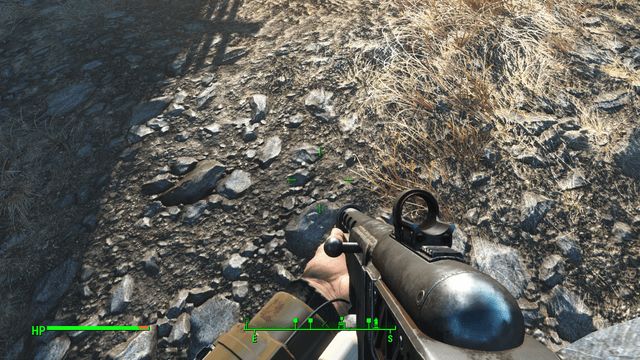
The first mod of the week is the ‘Commonwealth HQ Landscape Overhaul WIP,’ by Printerkop. Now, we all know there are sections of Fallout 4 that look very pretty, but at the same time there are other areas that look rather… bland, especially in the more barren parts of the wasteland. Basically, this mod overhauls the terrain textures - everything from the rocks and the soil to the vegetation and the garbage.
The new textures get rid of that slightly washed-out look that’s present in the vanilla game and bring a whole new level of detail to the land. It also adds more density and variety to the rocks, plants and dead leaves on the ground. The mod makes a noticeable difference to the game, yet manages to be subtle enough so as not to distract you with a whole new look. If Fallout 4 had been released looking this way, it would have likely received less criticism from those complaining about the “not as good as The Witcher 3” graphics.
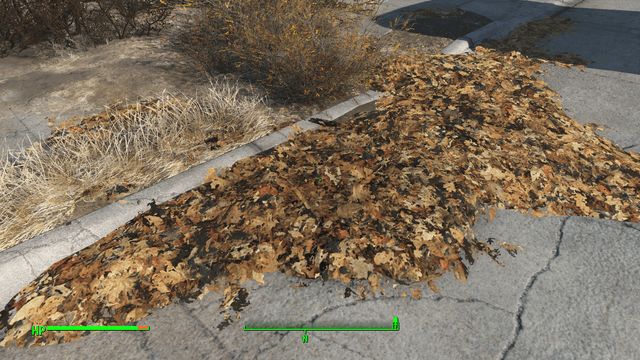
To get an idea of the changes the mod makes to the game, check out the two videos on this page. I’ve also shown a screenshot below of some leaves from Sanctuary, taken before I installed the mod.
Now here is one of the same location after I installed the mod. Notice the new levels of color and depth, the extra details in the soil and sand, and how much thicker and vibrant everything looks.
The mod’s creator, PrinterKop, notes that installing the mod will make the game’s loading times slightly longer.
But I have to admit that in the 4 to 5 hours that I’ve been using it - if not longer - I’ve failed to notice the loading screens hanging around for extended periods of time. Whether this has to do with the fact I’m using a solid state drive, I don’t know. It’s possible that playing the game using a standard hard drive will make the loading times noticeably lengthier, but for this extra level of detail I’d say it was worth it.
Moreover, don’t worry about these improved textures making your graphics card cry in pain. They currently only use 26 megabytes more VRAM than the vanilla textures, so unless you’re using a really low-end card (which won’t run Fallout 4 very well, anyway), you’re not going to take a performance hit.
Downloading and installing the mod is actually pretty straightforward, although it’s always worth backing up your game files first, including any loose configuration files, in case something goes wrong. For Fallout 4, these are located (by default) in:
C: > Program Files (x86) > Steam > SteamApps > Common > Fallout 4 C: > Users > [Your Profile] > My Documents > My Games > Fallout 4
There are two ways to install mods: The Nexus Mod Manager and using a manual installation. We’ll use the manual method here, as it’s just as easy. First download the files (from the ‘files’ section, duh!), then unpack the zipped TEXTURES directory (using a program like WinZip or 7-Zip) and place it inside the DATA folder in the Fallout 4 install directory, which should be located at:
C: > Program Files (x86) > Steam > SteamApps > Common > Fallout 4 > Data.
It’s important that you also modify your Fallout4.ini file to make the game mod-friendly. For this particular texture mod, simply go to:
C: > Users > [Your Profile] > My Documents > My Games > Fallout 4
and double click on the Fallout4.ini file to edit it (it may appear as just Fallout4). About three-quarters of the way down the text, you’ll find the line:
“sResourceDataDirsFinal=STRINGS\”
edit this line, so that it reads:
“sResourceDataDirsFinal=STRINGS, TEXTURES\”
This will allow you to play the game with modded textures. You can edit it further to allow different types of mods to be used (music, meshes, etc.), but if you’re only planning on using this mod right now, then that’s all the editing you need to do.
Ultimately, this is one of the best, if not the best, Fallout 4 mod I have used since the game was released. Not only that, but it’s also the first mod that I’m planning on permanently keeping in the game as I continue to make my way through every single area of Fallout 4 with an OCD-like tenacity.
I’ve had absolutely no issues with this mod negatively affecting other parts of Fallout 4, and it worked first time on installing with no problems or extra tinkering required.
On a final note, some people may be aware of the news about the recent Fallout 4 patch resulting in some mods no longer working with the game. Luckily, this hasn’t affected the Commonwealth HQ Landscape Overhaul WIP mod, and it still works without any problems.
I will continue to make sure each mod functions as it should before deciding it deserves ‘mod of the week,’ and I’ll always explain the best way to incorporate them into Fallout 4. I hope you enjoy Printerkop’s work as much I as do, and the best part of all is that he’s adding more textures to the mod every day.


